
Before your team mails its first card, an owner or manager sets three things: the return address printed on cards, who can mail cards, and an optional monthly spending limit per user. It takes a couple of minutes, and everything lives in one place.
Step 1 — Add your return address #
Cards can’t be mailed until your account has a return address.
- Go to Settings and find Mailed cards.
- Under Return address, click Add return address.
- Enter your company’s mailing address and click Save address.
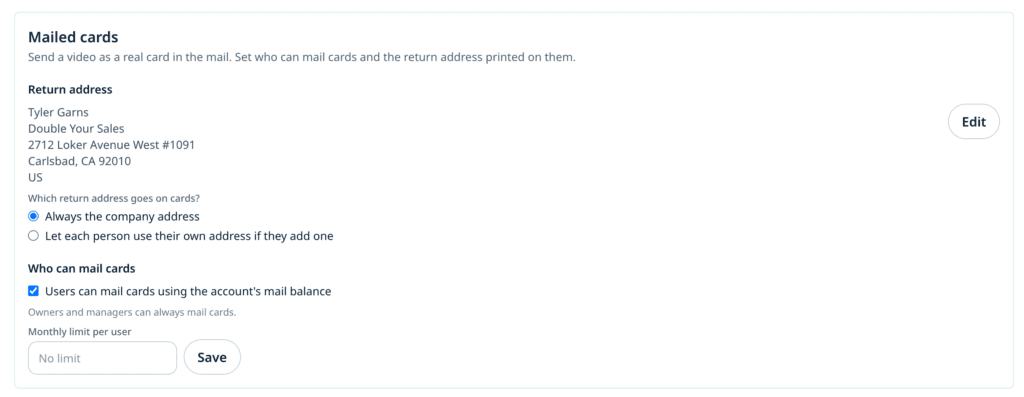
Success check: The address shows under Return address, and the “No return address yet” warning is gone.
Step 2 — Choose which return address goes on cards #
Under Which return address goes on cards?, choose:
- Always the company address: every card shows the address from Step 1.
- Let each person use their own address if they add one: useful for distributed teams, such as advisors or reps who work from their own office. Each person adds theirs under My return address in Settings. Anyone who doesn’t add one uses the company address.
Step 3 — Decide who can mail cards #
Owners and managers can always mail cards.
- Under Who can mail cards, switch on Users can mail cards using the account’s mail balance to let everyone on your team mail cards. Switch it off to keep cards to owners and managers.
- Optionally, set a Monthly limit per user so no one person can spend more than you intend. Choose No limit if you don’t want one.
- The table below lists each user, what they’ve Spent this month, and their Monthly limit. Change one person’s limit there, or leave it on Default to use the limit from step 2.
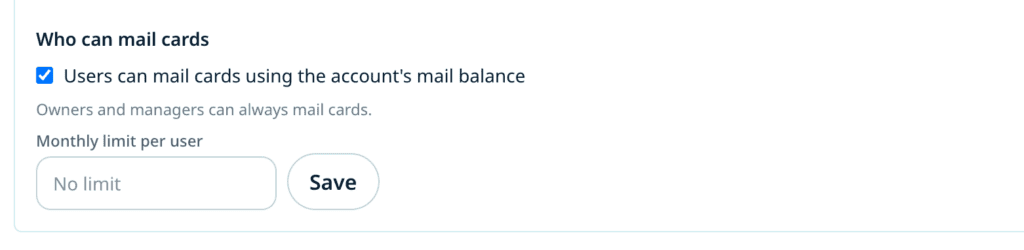
Success check: Users you’ve allowed see Mail a card at the send step; a user who reaches their limit sees how much more the card would need.
Step 4 — Manage saved recipient addresses #
When your team types an address while mailing a card and chooses Save this address for my team, it’s saved to a shared address book.
- In Settings, find Saved recipient addresses.
- Search by name, email or label.
- Click Delete to remove an address your team shouldn’t be offered again.
Everyone on your team who can mail cards can see, use and edit saved addresses. If you have a CRM connected, addresses are normally saved back to the contact’s CRM record instead, so they stay where the rest of your contact data lives.
Step 5 — Get told when a card is scanned (optional) #
- In Settings → Notifications, switch on Mailed card scanned.
- You’ll be alerted when someone scans the QR code on a card you sent.
To tag the contact or start a CRM workflow on a scan, see Track mailed cards and automate follow-up.
Tips and best practices #
- Start with a monthly limit, for example $25 per user, while your team gets the hang of it. You can raise or remove it any time.
- Keep the company address current. Undeliverable cards come back to it.
- Partner (agency) logins can’t mail cards from a client’s account. The client’s own team mails them.
Troubleshooting #
I don’t see Mailed cards in Settings. Only owners and managers see the account-wide settings. Users see My return address (when the policy allows it) and Saved recipient addresses.
A user says Mail a card is missing. Check that Users can mail cards using the account’s mail balance is on, and that they’ve chosen a single contact. Cards go to one person at a time.


